It’s Fall Y’all! You know that that means. Fall decor!!! Fall is certainly something to celebrate and what does every celebration need? Yes! A banner. This DIY Fall Banner is so easy to make. All you need is a Cricut machine, chipboard, felt, cardstock, twine and ribbon. This project can also be made using only paper, but I like the texture and look of combining different crafting elements. If you want to use my project without starting from scratch, you can find it here!
How To Create This Banner
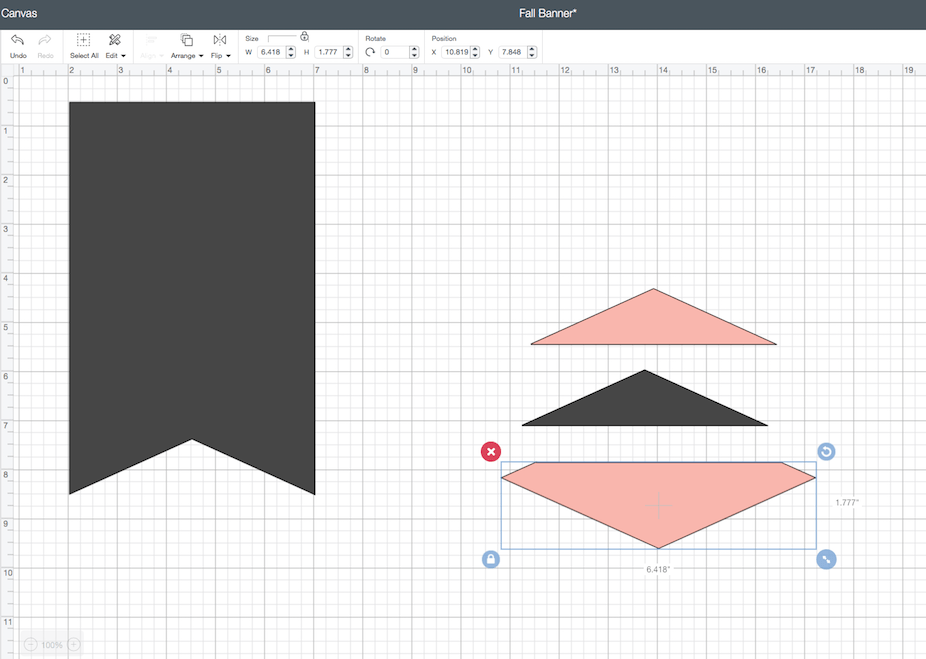
To create each flag , I first designed it inside of Circut’s Design Space. It’s super easy to do. If you want to, you could totally use a flag image that Cricut has and if you are a Cricut Access member it’s free. I personally like to create my own images when I can. All you need are two simple shapes. A square and a diamond. My flags are going to each measure 5X8, but you can definitely make yours smaller or slightly larger.

Next, you want to unlock the proportions lock so that you can stretch the diamond.


Now stretch the diamond and change the color so that you will be able to see it’s placement over your rectangle. Move the diamond to the bottom of your rectangle about where you want to put your points. Finally, we slice.

Next select both the rectangle and your diamond. You can do this by either clicking and dragging a box over them both or clicking the first shape and then shift clicking the second one. Now, we are going to slice a piece from our rectangle to make the points on the flag. This is probably my favorite tool!
Next, remove the leftover pieces of the diamond and the sliced rectangle parts and delete. You will be left with a beautiful flag!
Adding Holes for Hanging
Now we want to add holes to string whatever material you are using. I am using twine. Using the slice tool, we are going to slice two circles, one in each corner, just like we did with the diamond. Remove the leftover bits and delete. You now have your first flag base!

This will be the base for our banner and each base will have some type of embellishment. In this case, I am doing two print and cuts, two stencils and three basic cut outs.
Next, we want to create the flag overlay for each banner. This is just a second banner that it slightly smaller. Duplicate your finished flag and size is smaller.


Creating the Print and Cut Banners
Next, let’s create our print and cut flags.

Choose any Fall quote you like. I chose the two above. Once you put your images down and your font where you want them, you are going to want to flatten each flag separately to ensure it prints it instead of cutting out each letter. Select all of your font, images and banner and click ‘Flatten’.
Creating a Stencil
Now let’s create our stencil. I am using leaves and pumpkins for mine, but of course you can use any image you like. You want to make sure you are using cut images and not print and cut images for this part. You can find some great ones in design space or use mine! You can find my project here! I am starting four small leaves.

I like to layer mine on to see how I want it first. Now I am going to select one leaf and then shift + select the flag.

This way, both one leaf and the flag are ready for slicing. I couldn’t get all 4 leaves sliced at once, so I had to do them one by one.

Now you can move your pieces to reveal your first slice. Next, delete the sliced images (unless you would like to use them as accents) and repeat until all of your leaves are sliced through.

You are now done with your first stencil! Below are the three that I made.

Lastly, I am going to use the sliced pieces for the rest of the banner. I chose to use two leaves and a pumpkin.

Hang and assemble!
Next, all you need to do is assemble and hang!

Of course, you can get really creative with the material you use to string this banner. I am using twine, but you can use ribbon or even burlap would be nice.

Feel free to add some accents!

Hope you enjoyed this tutorial. Happy Fall Y’all!


